There are circumstances that a folder or even drive need to be shared to network. These are steps to share a folder to network in Windows XP Operating System.
- In Windows Explorer top bar, click Tools - Folder Options. In Folder Options go to View - Advanced settings, make sure to uncheck Use simple file sharing (Recommended) like in this following picture!

- After that, open Control Panel - Administrative Tools - Computer Management. Choose Shared Folders -Shares in left tab (pictured).

- Still in that windows, point mouse pointer in right tab and right click - New File Share (pictured).

- In opened wizard, click Next and this following windows will appear. Browse a folder intended to be shared and in Share name form type a name as you wish. Share description form can be left blank or descripted as users wishe. Then click Next!

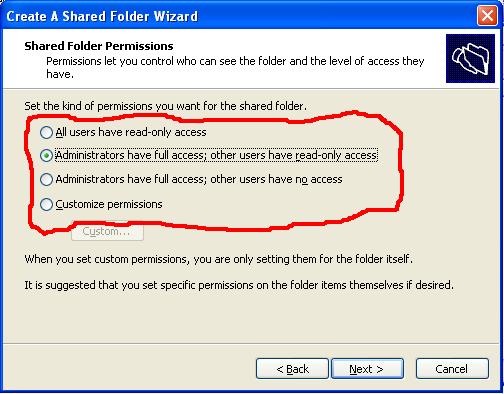
- In subsequent window like this following picture, set permission to users who access shared folder. Option chosen in this picture below indicate that users with Administrator account have full access, they can open, modify, delete, and save files in shared folder, whether users with guest account only open documents in shared folder. Choose appropriate permission as required!
- By clicking Next and Finish in window above whole steps are finished.
\\123.23.22.21\Video
because computer with shared folder has IP Address 123.23.22.21 and Shared Folder above named as Video. Watch this following picture for detail.

-


0 comments:
Post a Comment